Blog Editor
Write and publish blog posts for your own website, with the search-engine details filled in as you go.
What the page is for
The Blog Editor is where you write a blog post for your company's blog. You give the post a title, write the body with a full formatting toolbar, and set the web address, search description and featured image.
Posts can be saved as a draft, published or archived. A post can also appear in your knowledge base as well as the blog. While you write, the editor saves your work automatically.
Your blog's look, address and embed code are set on Blog Setup. Ready-made posts you can import and adapt are in the Public Content Library.
What you see
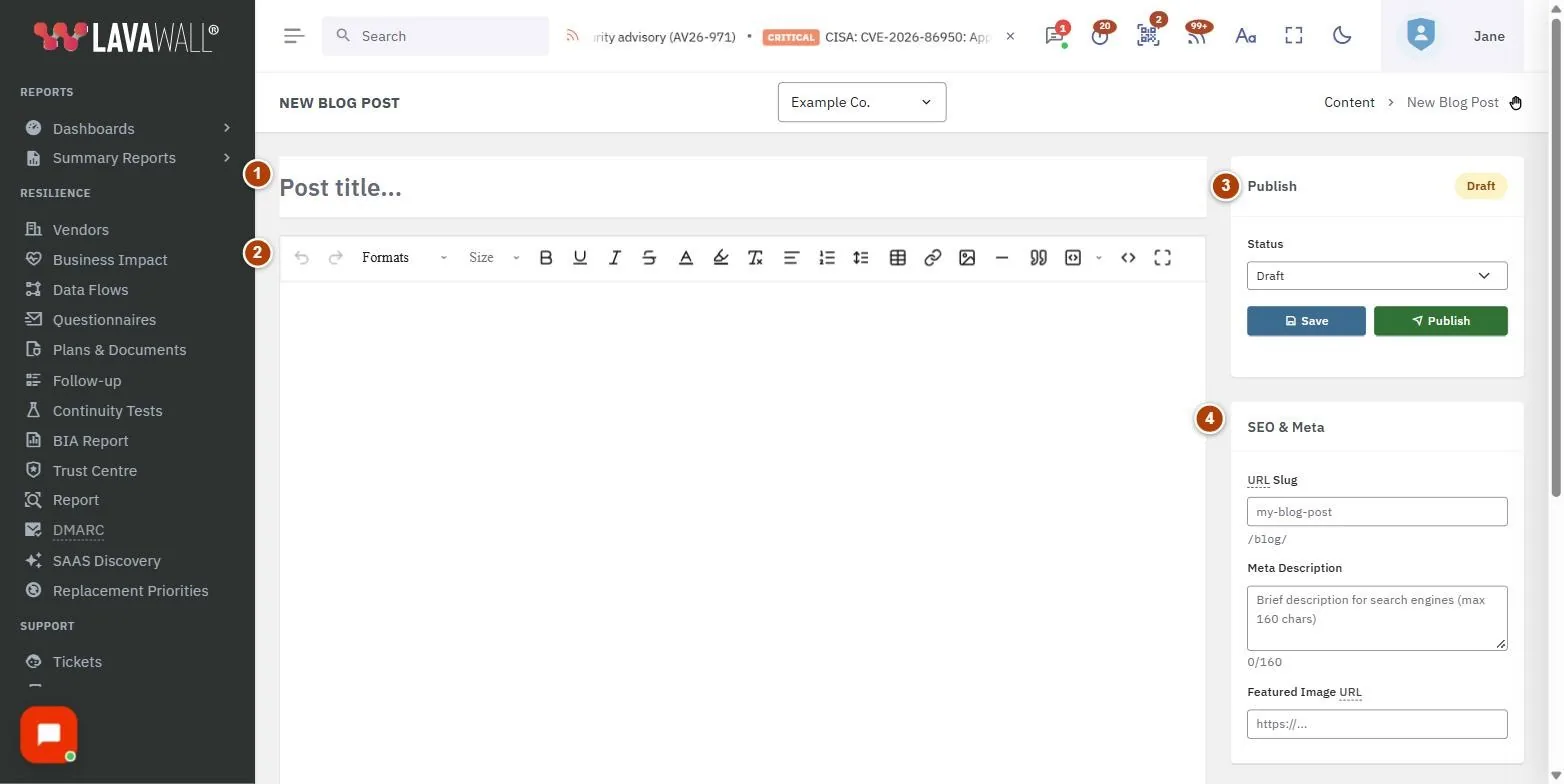
- Post title: the large title box at the top.
- Body editor: the formatted text area for the post.
- Publish: a status badge, the Status list (Draft, Published, Archived), Save, Publish and a "Saved" notice.
- SEO & Meta: URL Slug with a preview of the address, Meta Description (up to 160 characters, with a counter) and Featured Image URL.
- Options: Show in Blog, Show in Knowledge Base and Author.
- Actions: Back to CRM, Blog Settings and, for saved posts, View Live.
How to use this page
How to write and publish a post
- Type the post's title in Post title.... The URL Slug fills in from the title.
- Write the post in the body editor.
- Under SEO & Meta, check the URL Slug, write a Meta Description for search results, and add a Featured Image URL if you have one.
- Check Author, and choose whether to Show in Blog, Show in Knowledge Base or both.
- Select Save to keep it as a draft, or Publish to make it live.
How to edit an existing post
- Open the post from your content list in the CRM, or from View All Content on Blog Setup.
- Make your changes and select Save.
- Select View Live to see the published post in a new tab.
How to take a post off your blog
- Open the post.
- Set Status to Draft or Archived.
- Select Save.
Tips
- The editor saves automatically about 30 seconds after you stop typing, once the post has a title. Watch for "Saved" under the buttons.
- Keep the meta description under 160 characters; the counter shows how many you have used.
- Changing the slug changes the post's web address. Avoid changing it after the post has been shared.
- Pasted images are kept inside the post. For a featured image, use a web address to an image you host.
Troubleshooting
- "Title is required" appears when you save without a title. Add a title first.
- "Could not save" means the post was not saved. Check your connection and try again.
- "Post not found" means the post you tried to open does not exist or is not yours.
Task guides that use this page
Related articles
Still need help?
Search the support centre, or contact our support team and tell us which page you were on.
Names, companies, devices and figures in the pictures are examples. Other product and company names are trademarks of their respective owners.