Blog Setup
Set up your company blog so it matches your website, then add it to your site with a short snippet.
What the page is for
Blog Setup controls how your blog looks and where it lives. You set the blog's title, subtitle and address, how many posts show per page and on your homepage, and your logo, favicon and default sharing image.
To make the blog look like the rest of your website, you can paste your site's header and footer, add your own styles, extra head tags and analytics code. The page also gives you ready-made snippets to embed a blog listing or a homepage summary on your site, or a link to the full hosted blog page.
What you see
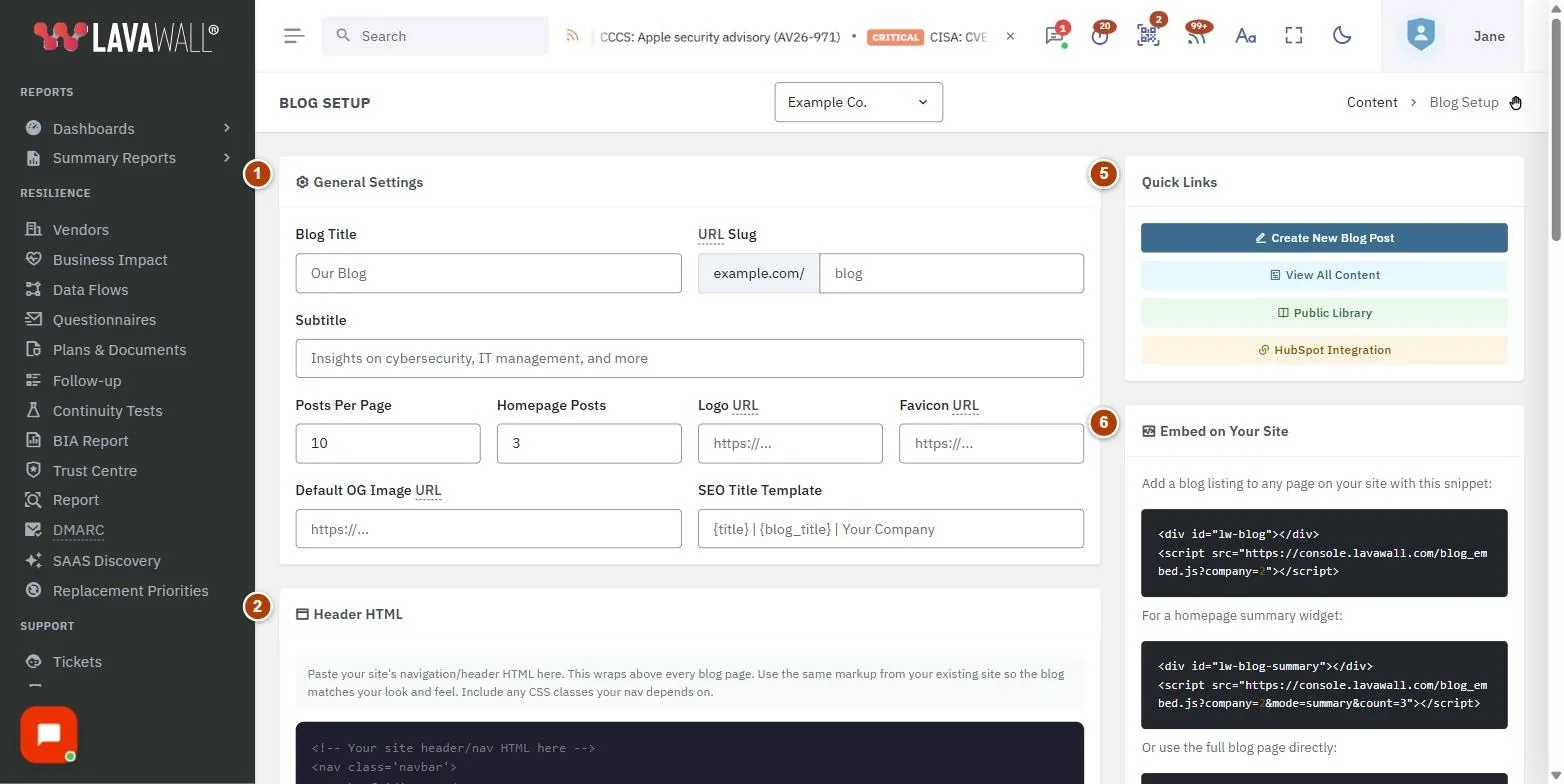
- General Settings: Blog Title, URL Slug, Subtitle, Posts Per Page, Homepage Posts, Logo URL, Favicon URL, Default OG Image URL and SEO Title Template.
- Header HTML and Footer HTML: your site's navigation and footer, wrapped around every blog page.
- Custom CSS, Extra <head> Content and Analytics Code: styling, head tags and tracking snippets.
- Save Configuration and Preview Blog.
- Quick Links: Create New Blog Post, View All Content, Public Library and HubSpot Integration.
- Embed on Your Site: snippets for a blog listing, a homepage summary widget, and the full blog page address.
How to use this page
How to set up your blog
- Under General Settings, enter the Blog Title and Subtitle, and the URL Slug for the blog's address on your domain.
- Set Posts Per Page and Homepage Posts.
- Add your Logo URL, Favicon URL and a Default OG Image URL for social sharing.
- Adjust the SEO Title Template, for example "{title} | {blog_title} | Example Co.".
- Select Save Configuration, then Preview Blog to see it in a new tab.
How to make the blog match your website
- Copy the navigation markup from your website into Header HTML. Include any styles your navigation depends on.
- Copy your website's footer into Footer HTML.
- Use Custom CSS to match fonts, colours and spacing. It is applied after your header, so it can override other styles.
- Add fonts, stylesheets or structured data in Extra <head> Content, and your tracking snippet in Analytics Code.
- Select Save Configuration and Preview Blog.
How to add the blog to your website
- In Embed on Your Site, copy the first snippet to show a blog listing on any page.
- For a short list of recent posts on your homepage, copy the homepage summary widget snippet.
- Or link to the full blog page address shown at the bottom.
- Paste the snippet into your website where you want the blog to appear.
Tips
- Start with Public Library to import ready-made posts, then customize them before publishing.
- Posting regularly adds fresh, keyword-rich pages that search engines and AI assistants can find, and shows clients your team is active.
- Analytics code is placed at the end of every blog page.
- Use HubSpot Integration if you also manage content in HubSpot.
Troubleshooting
- "Blog configuration saved!" confirms your changes. If you see an error instead, check your connection and save again.
- The blog looks unstyled. Check that your Header HTML includes the styles your navigation needs, or add them in Extra <head> Content or Custom CSS.
- Nothing shows in the embed. Make sure at least one post is published and set to Show in Blog.
Task guides that use this page
Related articles
Still need help?
Search the support centre, or contact our support team and tell us which page you were on.
Names, companies, devices and figures in the pictures are examples. Other product and company names are trademarks of their respective owners.